Delightful Fluffy Popovers Ready in 35 Minutes!
Craving something light and airy? Discover my kitchen-tested tips to bake light & airy popovers in 35 minutes, perfect for any brunch!

A Cozy Introduction to Popovers
Have you ever bitten into something that felt like a hug on a plate? for me, that’s what light and airy popovers are all about.
I remember the first time i tried them—i was at a friend’s brunch, and she served these fluffy little wonders fresh from the oven.
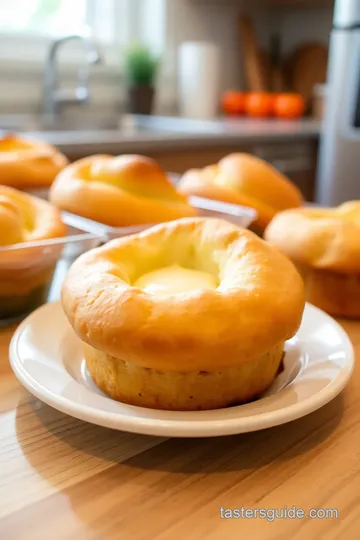
As they puffed up, filling the kitchen with this buttery aroma, i couldn’t help but think, “oh my gosh, i need to make these myself!” if you've ever wondered how to bake light & airy popovers in 35 minutes , you're in for a treat.
These golden pastries have a knack for turning any breakfast or brunch into something really special. with a mesmerizing crispy exterior and a light, fluffy inside, popovers are the kind of dish that make you feel fancy—even if you're just wearing pajamas.
And trust me, once you try this easy popover recipe , you’ll want to whip them up for every gathering.
The Story Behind Popovers
Though popovers feel like a modern-day luxury, they actually trace their roots back to the united states in the 19th century.
Reminiscent of yorkshire pudding, they’ve evolved into a staple for brunch tables everywhere. now, they aren't just old-school—they’ve taken modern kitchens by storm, popping up in upscale brunch recipes and gourmet popover fillings across the country.
So, how easy is it to bake these beauties? super easy! prep time is a breezy 10 minutes and they bake for about 25 minutes.
total? just 35 minutes to a delicious treat that gives you major brunch points with your friends. and best of all, the ingredients are pretty common and won’t break the bank.
Why You'll Love Making Popovers
Now, let’s talk about the good stuff—health and happiness! these egg-based pastries are surprisingly light, making them a perfect alternative to heavier brunch options.
Plus, they’re just so darn versatile! whether it’s savory popovers filled with cheese or sweet popovers drizzled with honey, the flavors are endless.
Perfect for special occasions like holidays or even a simple sunday morning, popovers can elevate your brunch table like no other dish.
And i can't stress this enough: if you catch them fresh outta the oven, with whipped butter and jam ready to go, you're in for a treat that’s better than any brunch spot in town!
Not to mention, there’s a bit of kitchen magic in baking popovers. when you see them rise in the oven, it's like watching a little transformation happen! the best part? you can play around with flavors and variations like herb-infused popovers or even a cheesy popovers recipe .
It’s all about making them your own.
The Perfect Popover Rise
So, you’re ready to dive into the kitchen and whip up some popovers? let's chat about essential tips. first off, using room temperature ingredients is key for that perfect popover rise.
Also, make sure you don't peek inside the oven too soon; trust the baking time and let them do their thing!
In just 35 minutes , you'll have a dozen fluffy popovers that will seriously impress your brunch crew. imagine pulling them out, serving them warm, and listening to everyone's delight as they dig in.
Whether you’re spreading whipped butter on a popover or drowning it in jam, it’s all about enjoying the moment.
So, are you ready to find out what you need to bake these light and airy pastries? let's dive into our ingredient list! trust me, you’ll want to keep these goodies on speed dial for every brunch gathering—from cozy family mornings to chic get-togethers with friends.
Essential Ingredients Guide for Perfect Popovers
Let’s chat about what you really need to whip up those "fluffy & golden popovers in just 35 minutes" . yep, we’re getting into essential ingredients.
And trust me, having the right stuff makes all the difference in your baking!
Premium Core Components
When it comes to popover ingredients , we’ve got some key players.
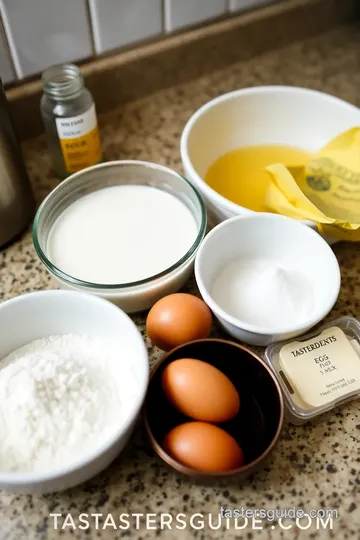
For this easy popover recipe, you’ll need:
- 1 cup (120g) all-purpose flour
- 1 teaspoon salt
- 1 cup (240ml) whole milk (make sure it’s at room temperature )
- 3 large eggs (also at room temperature )
- 2 tablespoons (30g) unsalted butter , melted and slightly cooled
Now, if you want quality indicators , look for flour that feels soft and fluffy in your hands. for milk, check if it’s fresh, and those eggs? they should be firm, not cracked.
Store your flour in a cool, dry place. it can last about 1 year if sealed well. milk should be used by the expiration date, and eggs can usually hang out for 3-5 weeks in the fridge.
Pro tip: if you're unsure about egg freshness, just drop it in a bowl of water. if it sinks, it’s all good; if it floats, toss it.
Signature Seasoning Blend
While popovers are simple, they can still pack a flavor punch! think about your spice combinations. for a traditional popover, you don’t need much beyond a pinch of salt.
But if you’re feeling adventurous, herb-infused popovers with rosemary or thyme can elevate your brunch table. you might even want to try a cheesy popover recipe by adding some shredded cheddar into the mix!
What about regional variations? Folks in New England sometimes toss in a little nutmeg for a cozy twist, while those down south might prefer a dash of cayenne for a kick.
Smart Substitutions
Now let’s talk alternatives, shall we? you might find yourself in a bind without all the ingredients. no whole milk? no problem! use 2% milk or even a plant-based option like almond milk.
And if you’re out of butter, a good olive oil can do the trick.
If you want to lighten things up for dietary modifications, skip the butter altogether or use a dairy-free spread. Seriously, you can whip these babies up without missing a beat!
Kitchen Equipment Essentials
You'll also need some kitchen gear to get things poppin'. Grab a popover pan or even a muffin tin —both work like a charm.
Make sure you have:
- A mixing bowl
- A whisk
- Measuring cups and spoons
A quick note on preparation: preheat that oven to 425° f ( 220° c) before you even think about mixing your ingredients.
Trust me, your popovers won’t rise if the oven's not hot enough!
For storage, keep your popover pans tucked away in a dry cabinet. if you make a double batch (which, let’s be honest, you should!), store any leftovers in an airtight container in the fridge.
They’re best fresh, but you can reheat them in the oven for about 5- 10 minutes to revive that crispy outer layer.
Wrapping it Up
So there you have it! a quick crash course in all the essentials you need to nail that light and airy pastry vibe with your homemade popovers.
Get your ingredients lined up, gather your kitchen tools, and get ready to bake light and airy popovers in 35 minutes.
Next, we’ll dive into the step-by-step instructions for crafting these beauties. You won't want to miss that—trust me!
Mastering Professional Cooking: Bake Light & Airy Popovers in 35 Minutes
There's something magical about fresh homemade popovers that just makes your brunch feel upscale, right? whether you’re hosting friends or just treating yourself, these light and airy pastries can elevate your breakfast game.
Let’s dive into how you can bake light & airy popovers in 35 minutes using some pro cooking methods. trust me, you’ll want to make these over and over!
Essential Preparation Steps
First up, let’s get organized. this is where mise en place —fancy french for “everything in its place”—comes in. before you even think about turning on the oven, gather all your popover ingredients .
You need flour, eggs, milk, salt, and butter. having everything ready saves you from scrambling (pun intended) when you're deep in the cooking flow.
Time management is your best friend! take a quick 10 minutes to prep before the oven even starts to preheat.
This includes whisking your dry and wet ingredients separately. while the oven is heating up to 425° f ( 220° c) , you can grease your popover or muffin tin.
Now, let's talk organization. keep things tidy! clean-as-you-go is not just a cute saying; it prevents you from drowning in chaos and helps you focus on what really matters: baking those fluffy popovers.
And don't forget safety! always use oven mitts when you’re handling hot pans.
Step-by-Step Process
Now that we’re all set, let’s get to the fun part: actually making the fluffy popovers .
- Preheat your oven to 425° F ( 220° C) .
- Prepare your pan : Grease it well with butter so your popovers don’t stick. Nobody wants a popover tragedy.
- Whisk together dry ingredients : Mix 1 cup of flour and 1 teaspoon of salt in one bowl.
- Mix your wet ingredients : In another bowl, whisk 1 cup of room temperature milk and 3 large eggs until smooth. Using room temperature ingredients is a game changer; it helps with that perfect popover rise!
- Combine the mixtures : Gradually whisk your wet mixture into the dry mixture. You want it combined but a few lumps are totally okay.
- Gently fold in the melted butter —2 tablespoons should do the trick.
- Pour the batter : Fill each cup of your greased pan about halfway.
- Bake : Pop it in the oven for 20- 25 minutes . You’ll see them rise dramatically—those golden popovers are no joke!
- Check for doneness : They should be puffed and golden brown, and firm to touch.
- Cool for a minute : Take them out of the oven, let them cool slightly on a rack, and then serve!
Expert Techniques
Once you’ve nailed the basics, let’s take it up a notch with some best popover tips .
- Don’t open that oven door! I know it’s tempting to peek, but temptation leads to collapse!
- Quality checkpoints : You wanna see a beautiful golden-brown complexion, like coffee in the morning.
- If your popovers aren’t rising like you hoped, troubleshoot! Check your oven temperature or make sure your ingredients were at room temp.
Success Strategies
Now, let’s avoid some common pitfalls on our popover journey.
- Don’t overmix : That will make your popovers dense. Lumps are good!
- Always use a hot pan. Pour in that batter fast so it starts cooking immediately.
- If you want to get fancy, whip up some gourmet popover fillings or go cheesy with a cheesy popovers recipe —the possibilities are endless!
Want to make ahead? You can pre-mix your dry ingredients the day before and store them. Just add your wet ingredients when you’re ready to bake.
Additional Information
So there you have it; with just a bit of planning, you can whip up perfect golden popovers whenever the mood strikes.
Seriously, these fluffy beauties are one of those quick brunch ideas that’s sure to impress. plus, they pair oh-so-well with whipped butter and jam—or maybe even a perfect savory filling!
So, before you tackle your next brunch table ideas, remember these cooking with popover pans techniques. With practice, you’ll be the go-to popover pro! Up next, we’ll dive deeper into some nutritional info for popovers , troubleshooting complex baking issues, and variations on popovers to keep your tastebuds singing!
Happy baking, y’all!

Unlocking the Secrets of Golden Popovers
Oh my gosh, if you’ve never made light and airy pastries like popovers, you’re seriously missing out! these fluffy little wonders are a quick brunch idea that can make you feel like a gourmet chef in no time.
We're talking about baking light & airy popovers in 35 minutes ! perfect for impressing all your friends or simply indulging yourself on a lazy sunday.
Let’s dive into some pro tips , serving secrets, and even a few fun variations!
Pro Tips & Secrets
First things first: let's chat about the secret to achieving that perfect popover rise . here’s the magic: room temperature ingredients .
Seriously, bring your eggs and milk to room temp before you start mixing. this helps everything blend smoothly, and trust me, you’ll notice a difference.
Time-saving tip? preheat your oven before you start combing ingredients. it saves time, and you'll get the right sugar-crackle on that first bite.
Also, when you’re baking popovers , don’t you dare open that oven door. if you take a peek too soon, they might decide to deflate like a sad balloon.
Now, to give your popovers a little extra oomph, sprinkle in some cheese or herbs during the mixing process. This is your time to shine with savory popovers , and who doesn’t want to bite into a cheesy cloud of goodness? For presentation tips , serve these bad boys on a colorful platter, and watch your friends’ faces light up!
Perfect Presentation
Making your dish look stunning doesn’t have to be a pain. plating is everything, right? once your popovers are all puffed up and golden, think about how to serve them.
You can dust them lightly with powdered sugar for a sweet option or add a sprinkle of fresh herbs for a savory twist.
Garnish ideas could range from delicate edible flowers to a simple sprig of rosemary.
Color combinations really pop when you pair these with vibrant sides like roasted cherry tomatoes or a green herb salad.
It turns your serving table into a masterpiece! and let’s not forget a little dollop of whipped butter and jam on the side—it’s heaven!
Storage & Make-Ahead
Now, if you end up with any leftovers (which, let’s be real, is rare), you’ll want to know how to keep them fresh.
Store your homemade popovers in an airtight container for up to two days. they won’t have that same glorious fluff once they go stale, but you can still reheat them! shove them back into a hot oven at about 350° f for a few minutes to bring them back to life.
Want to get ahead? You can mix your batter the night before. Just cover and refrigerate it. When you’re ready, let it come to room temp before baking.
Creative Variations
Alright, let’s talk variations on popovers ! feeling adventurous? you can add all sorts of flavors. how about a cute cheesy popovers recipe ? just toss in half a cup of shredded cheddar for a gooey treat.
If you’re craving something sweet, a touch of vanilla and some sugar can transform them into sweet popovers perfect for brunch.
If you’re in the mood to riff on the classic, think seasonal! fresh herbs in spring, maybe some pumpkin puree in the fall—there’s no wrong way to do it.
You can even try savory variations with bacon bits or different cheeses like gouda or feta. get creative and have fun!
Complete Nutrition Guide
Before we wrap things up, let’s shine a light on the nutritional info for popovers . each popover packs in around 80 calories, 3g of protein, and about 4g of fat.
They’re light but satisfying, making them a dream addition to your brunch table. just remember to keep your portions in check, especially if you’re nabbing a few cheesy or sweet variations.
Expert FAQ Solutions
And for my pals with questions, i see you! common issues include dense popovers. a quick fix? make sure your batter is well combined but not overmixed.
And, for those daring to use a muffin tin instead of a popover pan, just know that you might sacrifice a little of that magical fluff.
But hey, they’ll still be delicious!
In closing, baking popovers should be a fun adventure in your kitchen. with the right techniques and a little creativity, you’ll be impressing friends and family in no time.
So roll up those sleeves, and let’s get to baking! popovers are calling, and you’re going to love every bite!
Delightful Fluffy Popovers Ready in 35 Minutes! Card

⚖️ Ingredients:
- 1 cup (120g) all-purpose flour
- 1 teaspoon salt
- 1 cup (240ml) whole milk, at room temperature
- 3 large eggs, at room temperature
- 2 tablespoons (30g) unsalted butter, melted and slightly cooled
🥄 Instructions:
- Step 1: Preheat oven to 425°F (220°C).
- Step 2: Prepare the pan: Grease the popover pan or muffin tin with butter, ensuring complete coverage.
- Step 3: Mix dry ingredients: In a mixing bowl, whisk together flour and salt.
- Step 4: Combine wet ingredients: In a separate bowl, whisk together milk and eggs until fully combined.
- Step 5: Combine mixtures: Gradually add the wet ingredients to the dry ingredients, whisking until just smooth.
- Step 6: Add melted butter: Fold in the melted butter gently to incorporate.
- Step 7: Pour batter into the pan: Fill each cup of the prepared pan about halfway full with batter.
- Step 8: Bake: Place in the preheated oven and bake for 20-25 minutes until puffed and golden brown.
- Step 9: Check doneness: They should rise significantly and be firm to the touch when done.
- Step 10: Cool briefly: Remove from the oven and let cool for a couple of minutes before serving.
Previous Recipe: Easy Homemade Berbere Spice Blend - Flavorful & Raw Inspiration!
Next Recipe: How to Make Fried Beef Birria Balls | Cheesy Delight: Amazing Comfort Food!